If you're not satisfied with AccountSupport, we'll give you your money back. No questions asked. During the first 30 days, we'll refund your hosting fees in full.
Customer Satisfaction at AccountSupport
Your satisfaction is our top priority, and we're confident that you'll be pleased with our services:
- how easy it is to set up a website
- friendly, 24x7 phone support
- SiteLock's state-of-the-art security suite
Still, if you try us and decide that AccountSupport just isn't for you, we think you should get your money back.
What Happens to Your Domain
If you register a domain through AccountSupport, please note there is a non-refundable $15 domain fee. This fee not only covers our own costs, but it ensures that, even if you're dissatisfied with your experience at AccountSupport, you won't lose your domain name. You'll be free to transfer it or simply point it elsewhere.
Please note: The 30-day money-back guarantee applies to our hosting plans; it does not apply to most add-on services, such as domains, as mentioned above.


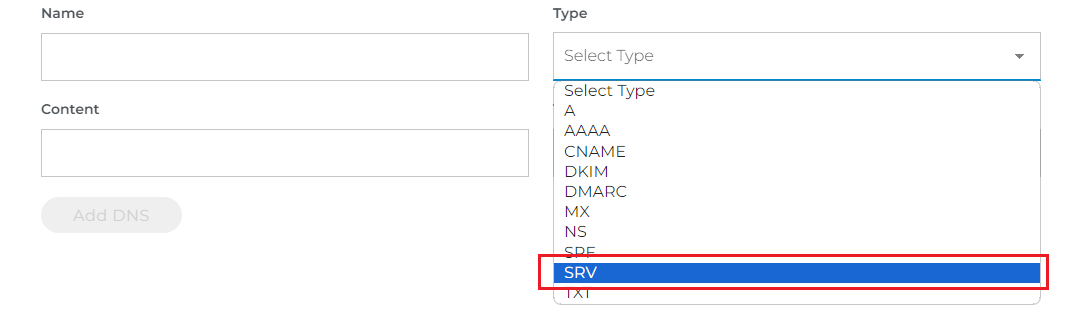


 Adding an SRV Record takes propagation time based on the geographical location.