Email Client Setup: Old Android Devices
Android Email Setup Video Walkthrough (Android starting at 1:45 into the Video)
Android Email Setup Walkthrough (IMAP)
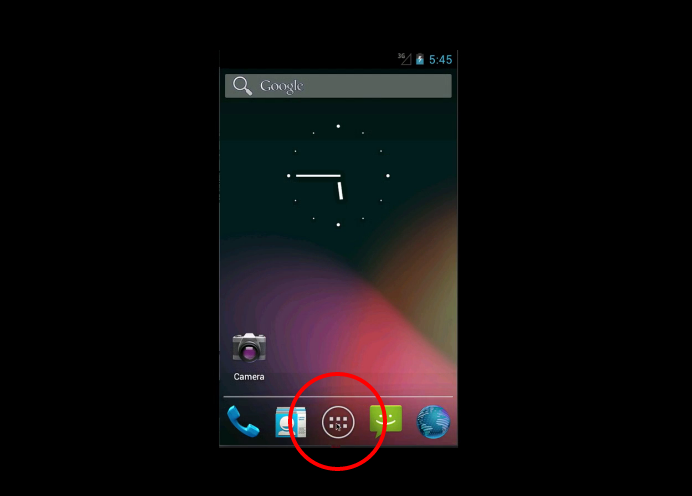 Step 1 | 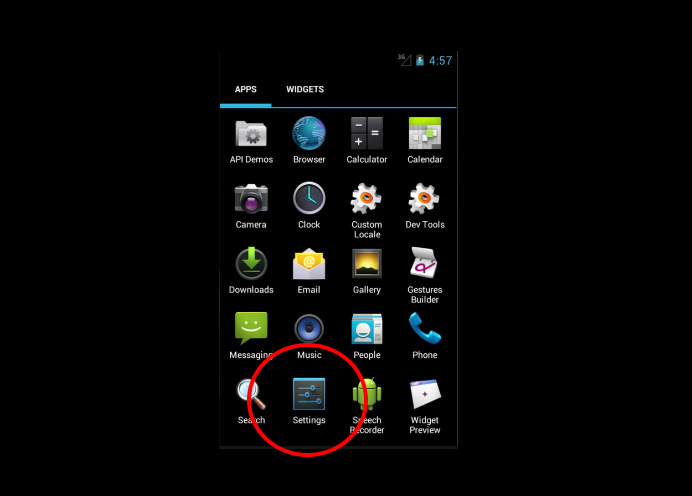 Step 2 | 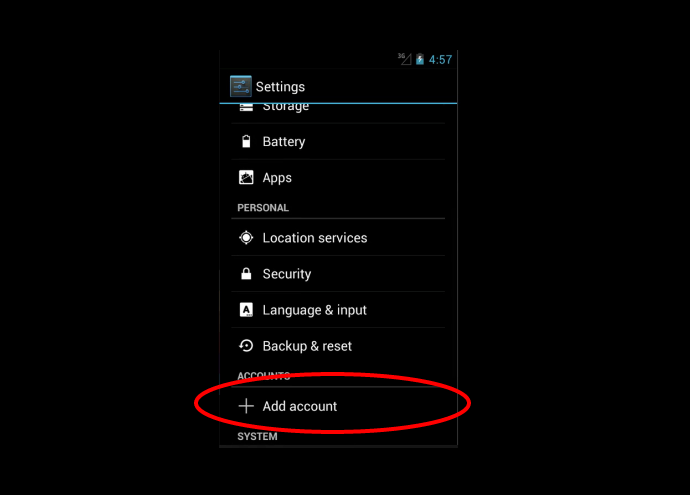 Step 3 |
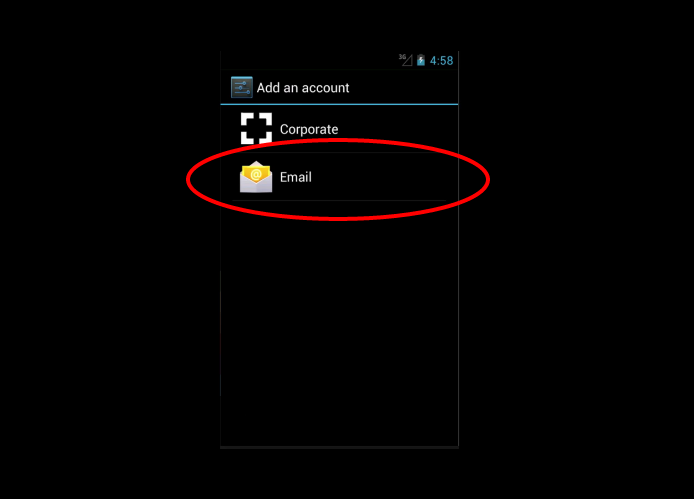 Step 4 | 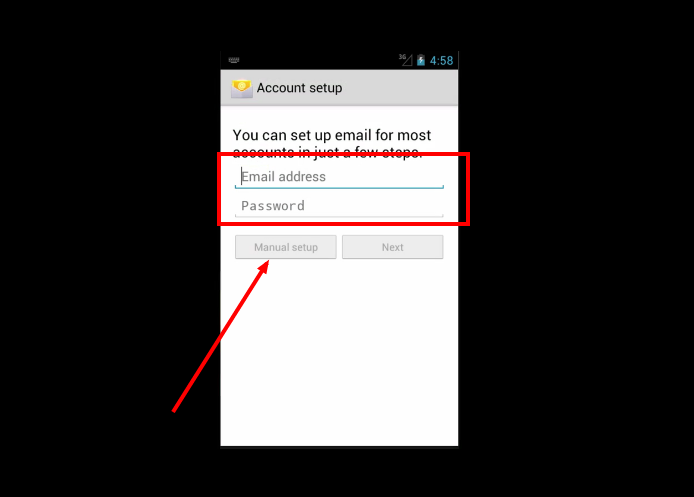 Steps 5 & 6 | 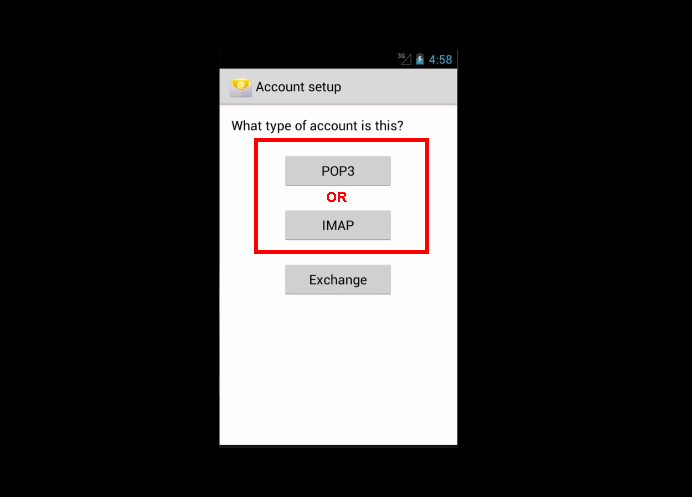 Step 7 |
 Step 8 | 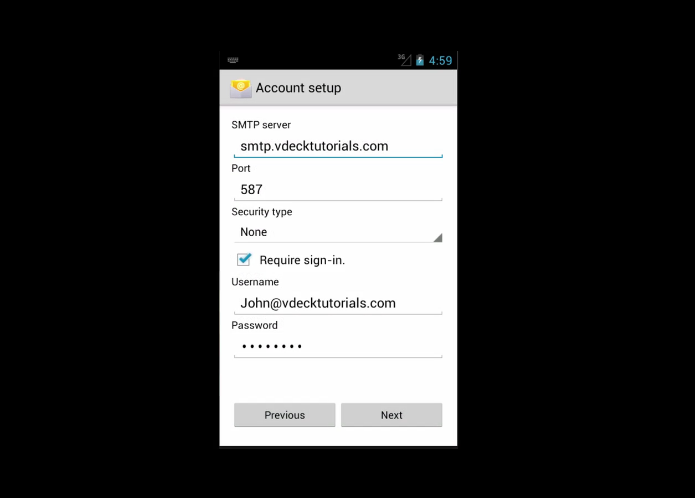 Step 10 |
You will need your incoming mail server, outgoing mail server, full email address, and your email password. The default settings are listed below.
- Go to View All Applications.
- Go to Settings.
- Select Add Account.
- Select Email.
- Fill in the following information:
- Email Address: Your full mailbox address (example: john@your-domain.com)
- Password: Your mailbox password
- Select Manual Setup.
- Choose IMAP.
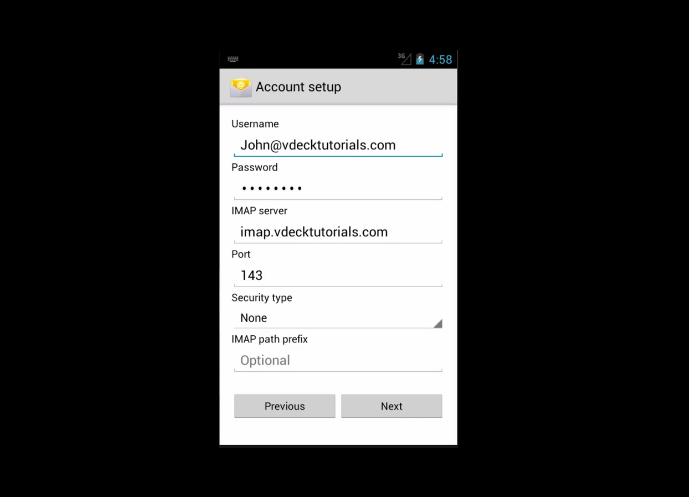
- Fill in the following information:
- Username: Your full mailbox address (example: john@your-domain.com)
- Password: Your mailbox password
- IMAP Server (Incoming): imap.%%Domain%%
- Port (Incoming): 143
- Security Type: You can choose to enable SSL with this setting. If you choose to enable SSL, be sure to change the Port settings accordingly.
- IMAP Path Prefix (Optional): You can simply leave this blank.
- Select Next.
- Fill in the following information:
- SMTP Server (Outgoing): smtp.%%Domain%%
- Port (Outgoing): 587
- Security Type: You can choose to enable SSL with this setting. If you choose to enable SSL, be sure to change the Port settings accordingly.
- Require Sign-In: We recommend having this box checked.
- Username: Your mailbox address (example: john@your-domain.com)
- Password: Your mailbox password
- Select Next.
- The email setup for your Android Device is now complete.
Android Email Setup Walkthrough (POP)
 Step 1 |  Step 2 |  Step 3 |
 Step 4 |  Steps 5 & 6 |  Step 7 |
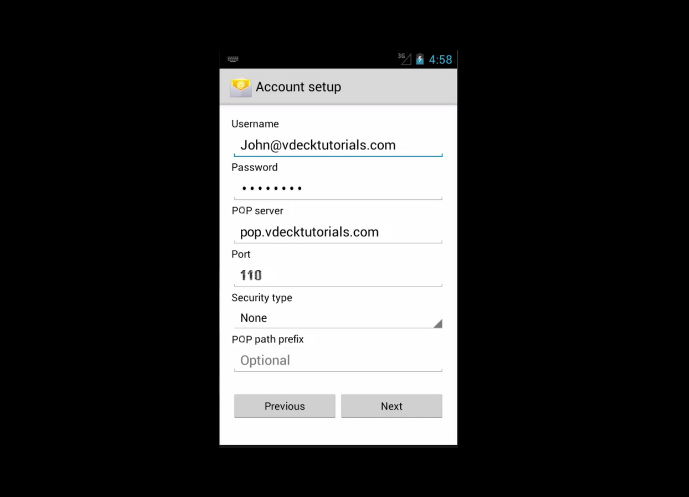 Step 8 |  Step 10 |
You will need your incoming mail server, outgoing mail server, full email address, and your email password. The default settings are listed below.
- Go to view all applications.
- Go to Settings.
- Select Add Account.
- Select Email.
- Fill in the following information:
- Email Address: Your mailbox address (example: john@your-domain.com)
- Password: Your mailbox password
- Select Manual Setup.
- Choose POP.
- Fill in the following information:
- Username: Your mailbox address (example: john@your-domain.com)
- Password: Your mailbox password
- IMAP Server (Incoming): pop.%%Domain%%
- Port (Incoming): 110
- Security Type: You can choose to enable SSL with this setting. If you choose to enable SSL, be sure to change the Port settings accordingly.
- IMAP Path Prefix (Optional): You can simply leave this blank.
- Select Next.
- Fill in the following information:
- SMTP Server (Outgoing): smtp.%%Domain%%
- Port (Outgoing): 587
- Security Type: You can choose to enable SSL with this setting. If you choose to enable SSL, be sure to change the Port settings accordingly.
- Require Sign-In: We recommend having this box checked.
- Username: Your mailbox address (example: john@your-domain.com)
- Password: Your mailbox password
- Select Next.
- The email setup for your Android Device is now complete.
Still Having Issues Connecting to Your Mobile Device
- Refer to the generic troubleshooting steps for email client setup.
- Consult the developer's support site. We've found a few links that might assist you:
- Contact us so that we can help you troubleshoot the issue.